When You start your WordPress Blog or making WordPress Website for your Client. One of the most essential requirements is Form filling by the user in your WordPress Website.
It may be Contact Form, Subscription form, Feedback form, or any registration form.
All these requirements can be fulfilled by a single WordPress Plugin that is Contact Form 7 WordPress Plugin.
What You will Learn in this Article:
- Why we should use Contact Form 7 WordPress Plugin.
- Active and Install Contact form 7
- Learning the settings of Contact Form 7
- Creating a new Contact form and editing existing Contact form
- Contact Form 7 Integrations
Why you should choose Contact Form 7 WordPress Plugin.

When you search for Contact form plugin, You will get Many Contact forms WordPress Plugin. That question will come in Mind, Why you should choose Contact Form 7.
Here are some details About Contact Form 7:
- Contact Form 7 is completely free. All the features you got in the Contact form 7 are completely free.
- You can create unlimited Contact Forms, Feedback form or any other form.
- Contact Form 7 is simple to use. It don’t need any code requirement to create forms with Contact Form 7.
- You can choose the width, size, color, details according to your choice.
- You will get multiple Tag Options like email, Number, Date, Text Area, Radio Button and Many other details.
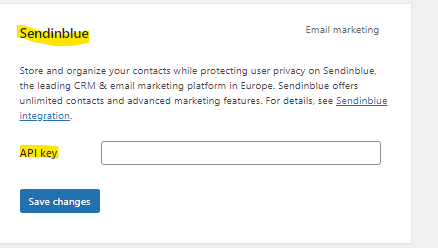
- It can easily integrate with Sendinblue, reCAPTCHA and Constant Contact.
Contact Form 7 in Numbers:
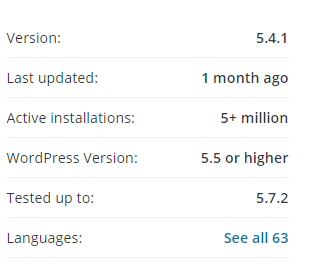
- Contact Form 7 has More than 5 Millions Active Installations.
- Contact for 7 can be configured in 63 languages more than any other Contact Form.
- Contact Form 7 can be work in 5.5 or higher Version in WordPress.
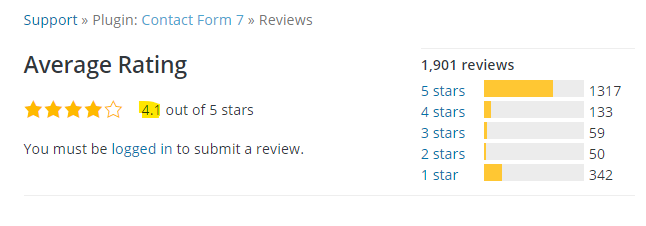
- It has average Rating of 4.1 and having 5 Rating by 1300+ users.
Active and Install Contact form 7
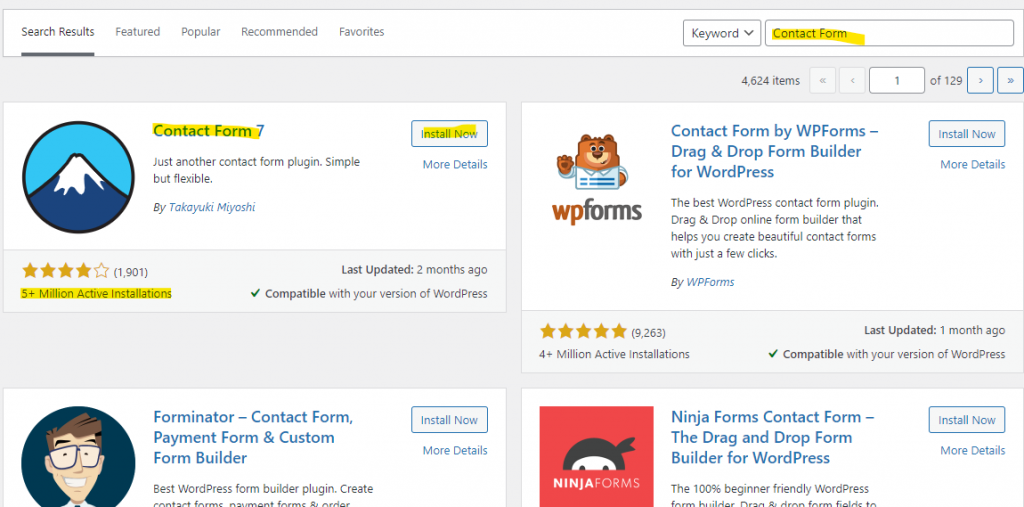
When You search for Contact form in Plugin Section. You will get Contact Form 7 in Top Results.
You Just Need to Install.
Then you got the option of Activate. Click on It
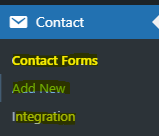
In Your WordPress Dash Board, Left Side Bar will see Contact. When You Click on it, You find 3 Options: Contact Forms, Add New and Integration.
Contact Forms: The Existing Forms which you have Built or the Default Forms are available in it. You can edit or delete the Contact Forms from there also.
Add New: From This Option, You can add New Contact Form or any other type of Form.
Integration: With This option You can Integrate with Other email Provider or spam Protection.
Contact Form 7 Settings and Form Creation
Now Your Contact Form 7 is Installed and Active. we will learn the Functionalities of Contact Form 7 and creating Contact Form 7.
You can Click on Contact Forms in above screenshot or the Add New.

Contact Form 7 Form
Then you will get 4 options: Form, Mail, Messages, Additional Settings.
Form: In this Feature, You can create the Form as per your requirements. You can change the label. Button Details as per your choice.
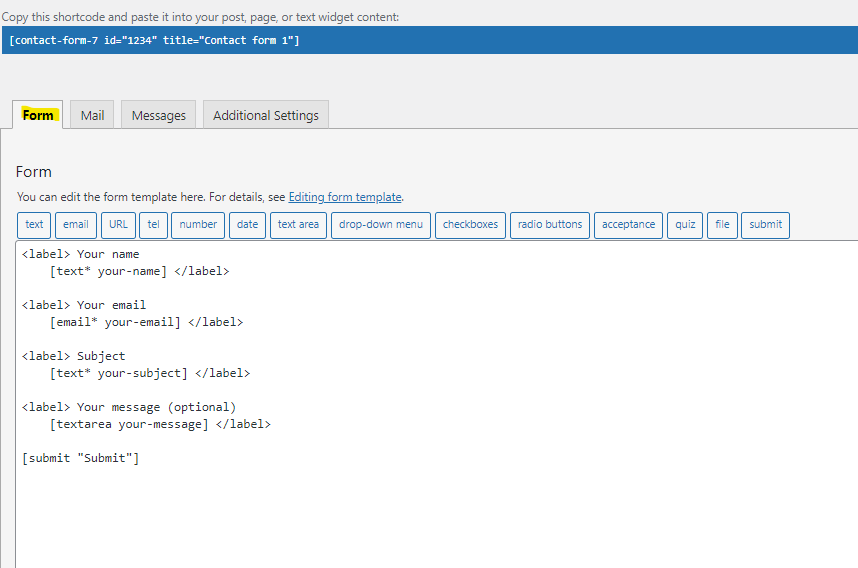
You will see Multiple Tags in The Form. You can choose any one and Update accordingly. In the latest version of Contact form 7, You will get option of Text, email, URL, tel, number, date, text area, Drop down menu, check boxes, Radio Button, acceptance, quiz, file, submit.

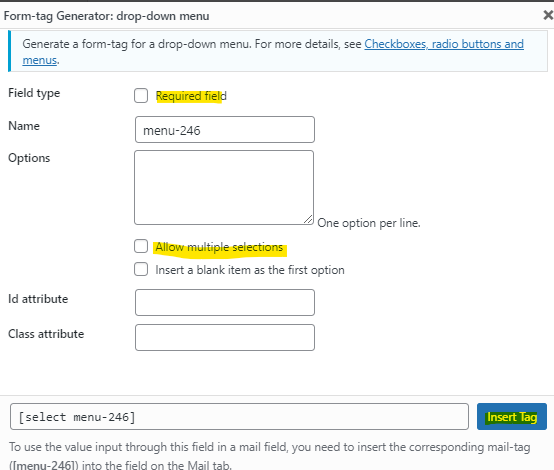
If you need to add any Field Area. You just need to click on it. You will get an option like below.
You can mark the field as Required Field as per your need. You can Give the name to the Field. As It is drop down. You should give options. Also the below Options like multiple selection are there or Blank Option. Then Just click on Insert Tag.
It will be added in your Form.
Contact Form 7 Mail
Contact Form 7 also has very good feature of email the users on your behalf.
If you have created the Subscription form or any registritation Form. There is a need to emailing the users to confirm their subscription.
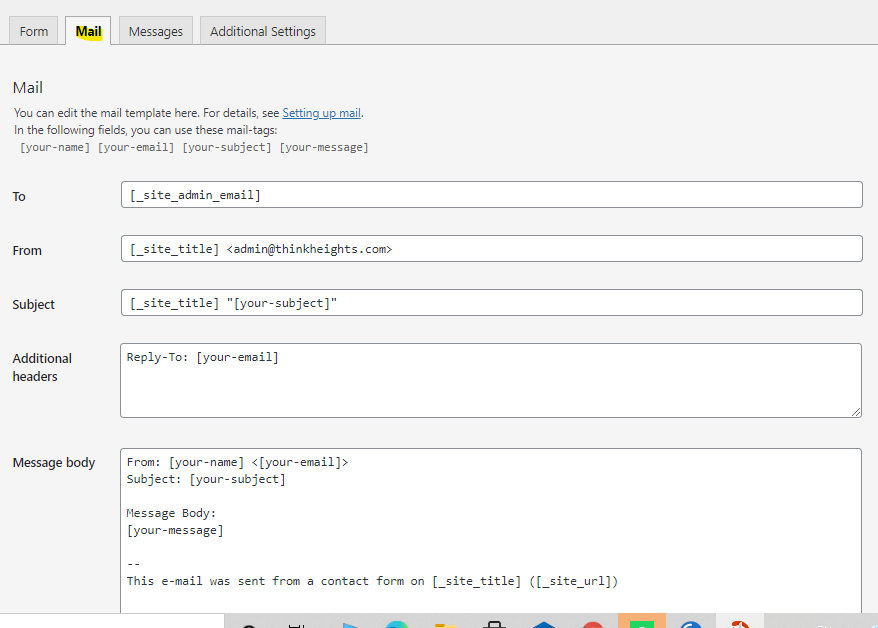
Contact Form 7 is sending the automatic email when they subscribe or register. This feature will be manged on the option of Mail.
Below is the default settings for the email. You can change the email address, Message Body and other details as per your requirements. You can set the email auto Trigger to your users.
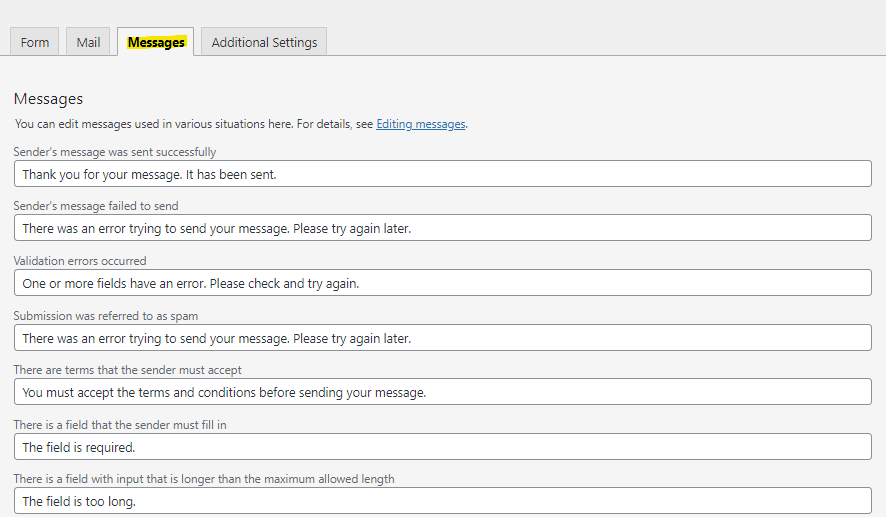
Contact Form 7 Messages
When You create Contact form or any other registration form. You may mark some field filed as mandatory, some field have some setting. If the user hasn’t filled or missed the required field in the form.
And The form filled successfully. This field will give users the instant pop up of success or any validation failure.
You can change the messages as per your need.
Contact Form 7 Additional Settings
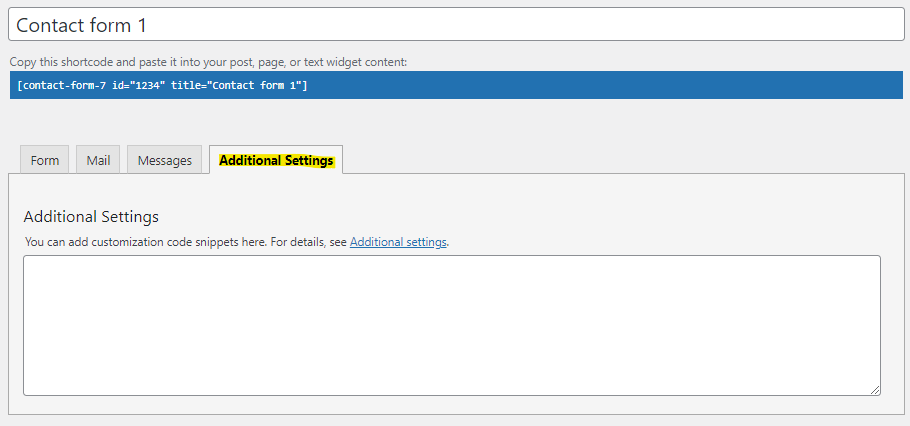
Contact Form 7 Additional settings :
This is one the very useful field, If you know little bit piece of coding. You can add extra css or piece of code to design your form as per your choice.
Contact Form 7 Short Code
After Doing all the changes, Your form will be ready.
You can choose the form in the Footer Section, Header Section, sidebar according to your need.
For Applying the form in Your WordPress Blog. You should copy the short code which generated in the upper side of contact form and paste it into the text widget where you want to show the form.
You can add multiple fields, Multiple tags in your contact form.

Contact Form 7 Integrations
Contact Form 7 can be integrate with other email marketing tools with simple API key.
by Default, Contact form 7 is providing you option to connect with Sendinblue and Constant Contact for email marketing.
And reCAPTCHA for spam protection.
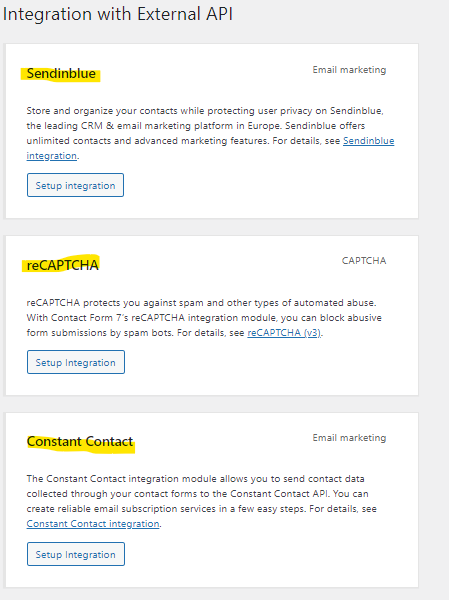
You just need to click on setup Integration and provide the API key to connect.
This is very simple and useful to manage multiple emails.
